Tuesday, January 29, 2013
Hello, Memory Bound friends!
Welcome to Part 2 of Our Crafting Resolutions for 2013! In this post, five more of our Memory Bound staff members will bravely state their crafting goals publicly! If you missed Part 1 of this post, you can catch it here.
We hope that by sharing our goals with you, we'll inspire you achieve your own goals this year! Of course, we all hope that we don't fall short:
We hope that by sharing our goals with you, we'll inspire you achieve your own goals this year! Of course, we all hope that we don't fall short:

Gloria:

This year, Gloria also plans to make more cards and try to use up some of her paper crafting stash!
Janet (that's me!):

Katie:

Katie is taking a different approach to scrapbooking this year. With two young boys, she and her husband are always on the go, so she wants to keep things simple, up to date, and organized.
In Katie's words: I am going to try to scrap in monthly mini albums. I find that my December Daily is doable, so I am going to try this technique of scrapping and documenting things that happen each month.
Note: Read more about the December Daily concept HERE and HERE.
For organization, I'm also going to sort through my supplies and do some hard-core purging! I can't continue the motto, "I might use this someday." I hope to sell it at the next Memory Bound garage sale!
Note: Watch for more information coming soon about our next big garage sale!
For organizing photos, I bought an Iris photo keeper (it has 16 small 4x6 photo keepers inside) and have labeled each keeper for each month. My goal is to print the photos at the end of each month and place them into the corresponding keeper. To keep me on track, I placed the photo keeper in an area that is easily accessible and visible!

Note: Stop by Memory Bound to check out the Iris photo boxes Katie references. We have them in two sizes -- the large one pictured above and a smaller box half this size. This is one of our favorite photo organization tools! Psst: It's also perfect for storing Copic Markers and embellishments!
I also love to do "traditional" (12x12) scrapbooking but am still playing around with how to accomplish this, since I'm also planning to do monthly mini-albums. As of right now, I think I'll plan to "traditionally scrapbook" my favorite photos from throughout the year and place them in a 12x12 album.
In order to keep up date with all of my goals, I am going to try to do a little each day instead of tons in a few days!
Kellie:

Maggie:

I fell short on my paper crafting goals last year, so I'm going to repeat them this year with high expectations of a better result! Last year I spent considerable time organizing and completing my craft room, and this year I want to put the space to good use.
My big goal for this year is to schedule scrapbooking time for myself each week to work on scrapbook pages and other projects. I didn't do this regularly last year, and that's why I fell short of my goals.
I always tell students in my Beginners' scrapbooking classes to edit, print, and back-up digital files regularly. If you don't do it regularly, it's very easy to fall behind. Guess what? I fell WAY behind last year so this is a top priority for me in early 2013.
I plan to finish the Disney/Harry Potter album I started many moons ago. I have the photos organized and the supplies purchased, so I just need to set aside time to do it!
Katie:

Katie is taking a different approach to scrapbooking this year. With two young boys, she and her husband are always on the go, so she wants to keep things simple, up to date, and organized.
In Katie's words: I am going to try to scrap in monthly mini albums. I find that my December Daily is doable, so I am going to try this technique of scrapping and documenting things that happen each month.
Note: Read more about the December Daily concept HERE and HERE.
For organization, I'm also going to sort through my supplies and do some hard-core purging! I can't continue the motto, "I might use this someday." I hope to sell it at the next Memory Bound garage sale!
Note: Watch for more information coming soon about our next big garage sale!
For organizing photos, I bought an Iris photo keeper (it has 16 small 4x6 photo keepers inside) and have labeled each keeper for each month. My goal is to print the photos at the end of each month and place them into the corresponding keeper. To keep me on track, I placed the photo keeper in an area that is easily accessible and visible!

Note: Stop by Memory Bound to check out the Iris photo boxes Katie references. We have them in two sizes -- the large one pictured above and a smaller box half this size. This is one of our favorite photo organization tools! Psst: It's also perfect for storing Copic Markers and embellishments!
I also love to do "traditional" (12x12) scrapbooking but am still playing around with how to accomplish this, since I'm also planning to do monthly mini-albums. As of right now, I think I'll plan to "traditionally scrapbook" my favorite photos from throughout the year and place them in a 12x12 album.
In order to keep up date with all of my goals, I am going to try to do a little each day instead of tons in a few days!
Kellie:

Kellie, one of our store owners, has several great goals for the New Year:
Says Kellie: For starters in 2013, I’d like to finish my 2012 junk-binders (AKA mini scrapbooks). I enjoyed creating them and love that these two little books show so much of what we did last year.
Then I have 3 for-sure projects on the list:
1. Start a mini-book to preserve 2013 memories using the Sn@p binders from Simple Stories.
2. Create a scrapbook for our trip to Florida last summer.
3. Start an album for our new grandson Daniel!
Maggie:

Maggie also has several projects planned for 2013:
She is planning to finish her grandson Eli's baby book in time for his first birthday in November.
She's also working on a wedding planner book for her son Alex's fiance for their April wedding.
And, like many of us, Maggie is hoping to find the perfect storage and organization systems for her scrap room!
* * * * *
So there you have it -- our crafting goals for 2013! We will plan to report on our progress as the year progresses...and hopefully we'll have a LOT of progress to report!
How about you? What are your goals for the New Year? Whether it's organizing your stash, starting a SN@P mini-album, or finishing that wedding album, stop by Memory Bound and let us help you be successful in 2013!
Janet
Tuesday, January 22, 2013
Hello, Memory Bound friends!
We're so fortunate at Memory Bound to have amazingly creative staff members. I'm always inspired by the projects they create! Diane, our store manager, recently showed me a mini-album she made for Christmas 2012. It was such a fun, inventive idea that I could not wait to share it with all of our Memory Bound friends!
Here's the background: Last fall, Diane created a "Christmas 2012" banner using one of our chipboard banner sets. The sets come with several pieces in assorted shapes which you can decorate any way you choose. Diane made a banner which she used for her family's Christmas photos and as a mantel decoration during the holidays.
Here's a great photo of her family with the beautiful banner she created. I love the idea of having the "2012" right in the photo so you'll always know when it was taken!

At the end of the holiday season, Diane transformed the banner into a unique mini-album by adding small photos and bits of journaling on each piece.
Here's the cover:
Here's the cover:

You can see how she tied each letter together, utilizing the front and back surfaces of each piece of the banner for photos and journaling. She even added a few banner shapes to provide more space for photos.


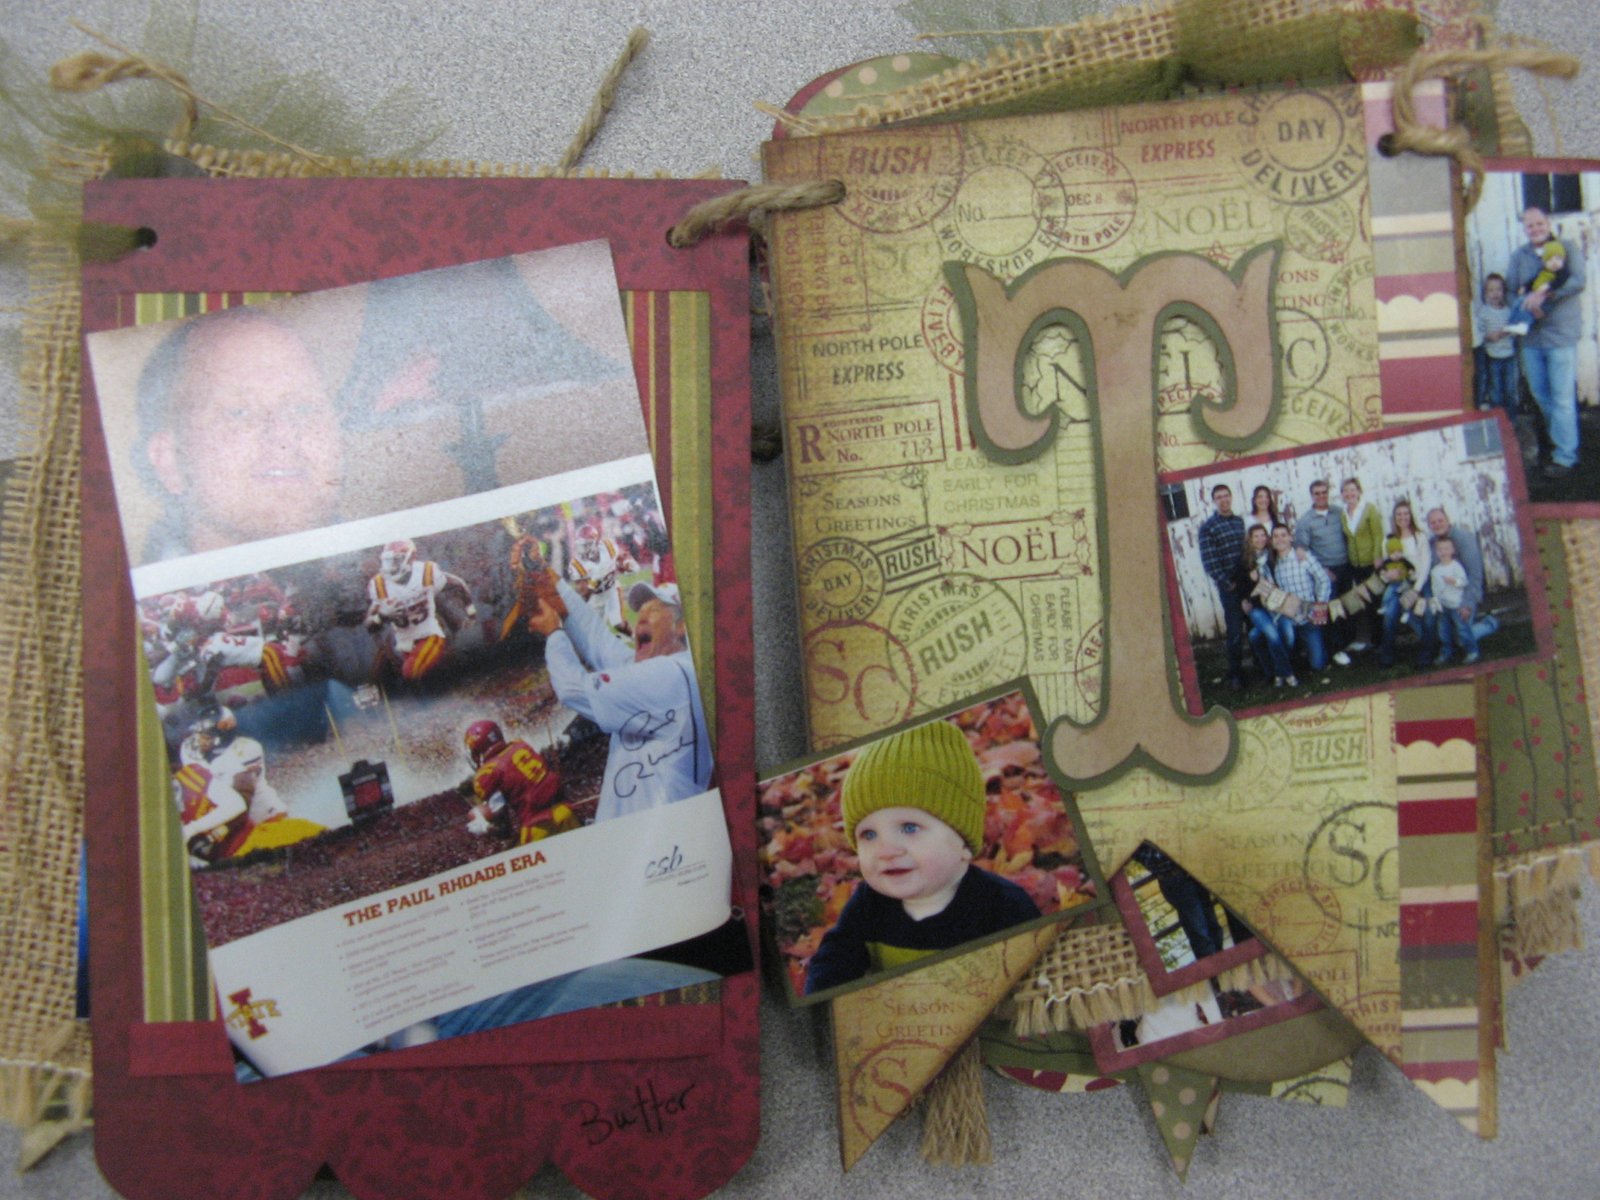
The pre-made chipboard banner pieces can be covered with paper or cardstock to match your home decor. Diane supplemented the chipboard pieces with burlap, cut into smaller pieces and "fringed" along the edges. Burlap is a popular material right now, adding an element of natural texture to most any project!


I love how Diane transformed her seasonal decor piece into a mini-album! Rather than pack it away for next season's mantel decoration (and worry about changing the year to 2013!), she created a treasure her family can enjoy all year long.

Of course, you can create a banner for any event or season! If you'd like to make your own, stop in and take a look at our pre-made chipboard banners by Paper Accents. We have a variety of sizes ranging in price from $2.99-$4.99 for a package containing 9 pieces. We'd love to help you plan your project, and if you purchase your paper at Memory Bound, you can even cut letters for your banner on our Accu-Cut die cut machine! Wouldn't it be fun to create a banner for Valentine's Day, Easter, or graduation -- then transform it into a mini-album after the holiday or event is over?
Thanks, Diane, for sharing your wonderful project with us!
Janet
Friday, January 18, 2013
Hello, Memory Bound friends!
You may remember the tulle balls Maggie made last year for our Wedding Showcase (see photos here). Well, Maggie is back at it again! She's started on a new batch of tulle balls for this year's wedding event, and she's got the technique down to a science!
Maggie joked that we we could have called this post "From Toilet Paper to Tulle Balls!" as her expertise with tulle balls actually dates back to her childhood growing up on the farm. As a little girl, she would tear apart toilet paper squares and stack them together to create fluffy flowers, spraying them with perfume when they were finished!
To make your own tulle balls, you'll need squares of tulle. Did you know that Memory Bound sells tulle by the yard? Dawn can order just about any color you need for your big event. Our tulle is 54" wide and sells for $1.99 per yard.

Maggie recently showed me how her fluffy tulle balls are made. To make a 9x9 tulle ball, Maggie started with 36 9x9 squares of tulle stacked together. She cut a few strips of tulle and tied it very tightly around the center.

Here's where Maggie has perfected her fluffing technique! She grabs a few layers of tulle and tugs them upward toward the center, alternating sides as she goes.

As she does this, the tulle ball gradually starts to take shape. Once it's completely fluffed, Maggie gives it a little "haircut", trimming off any uneven edges.

And here's a completed tulle ball, this one created with 12x12 squares. These tulle balls make wonderful (and economical!) ceiling decorations for weddings, showers, or any other type of event. Just hang them with fishing line!
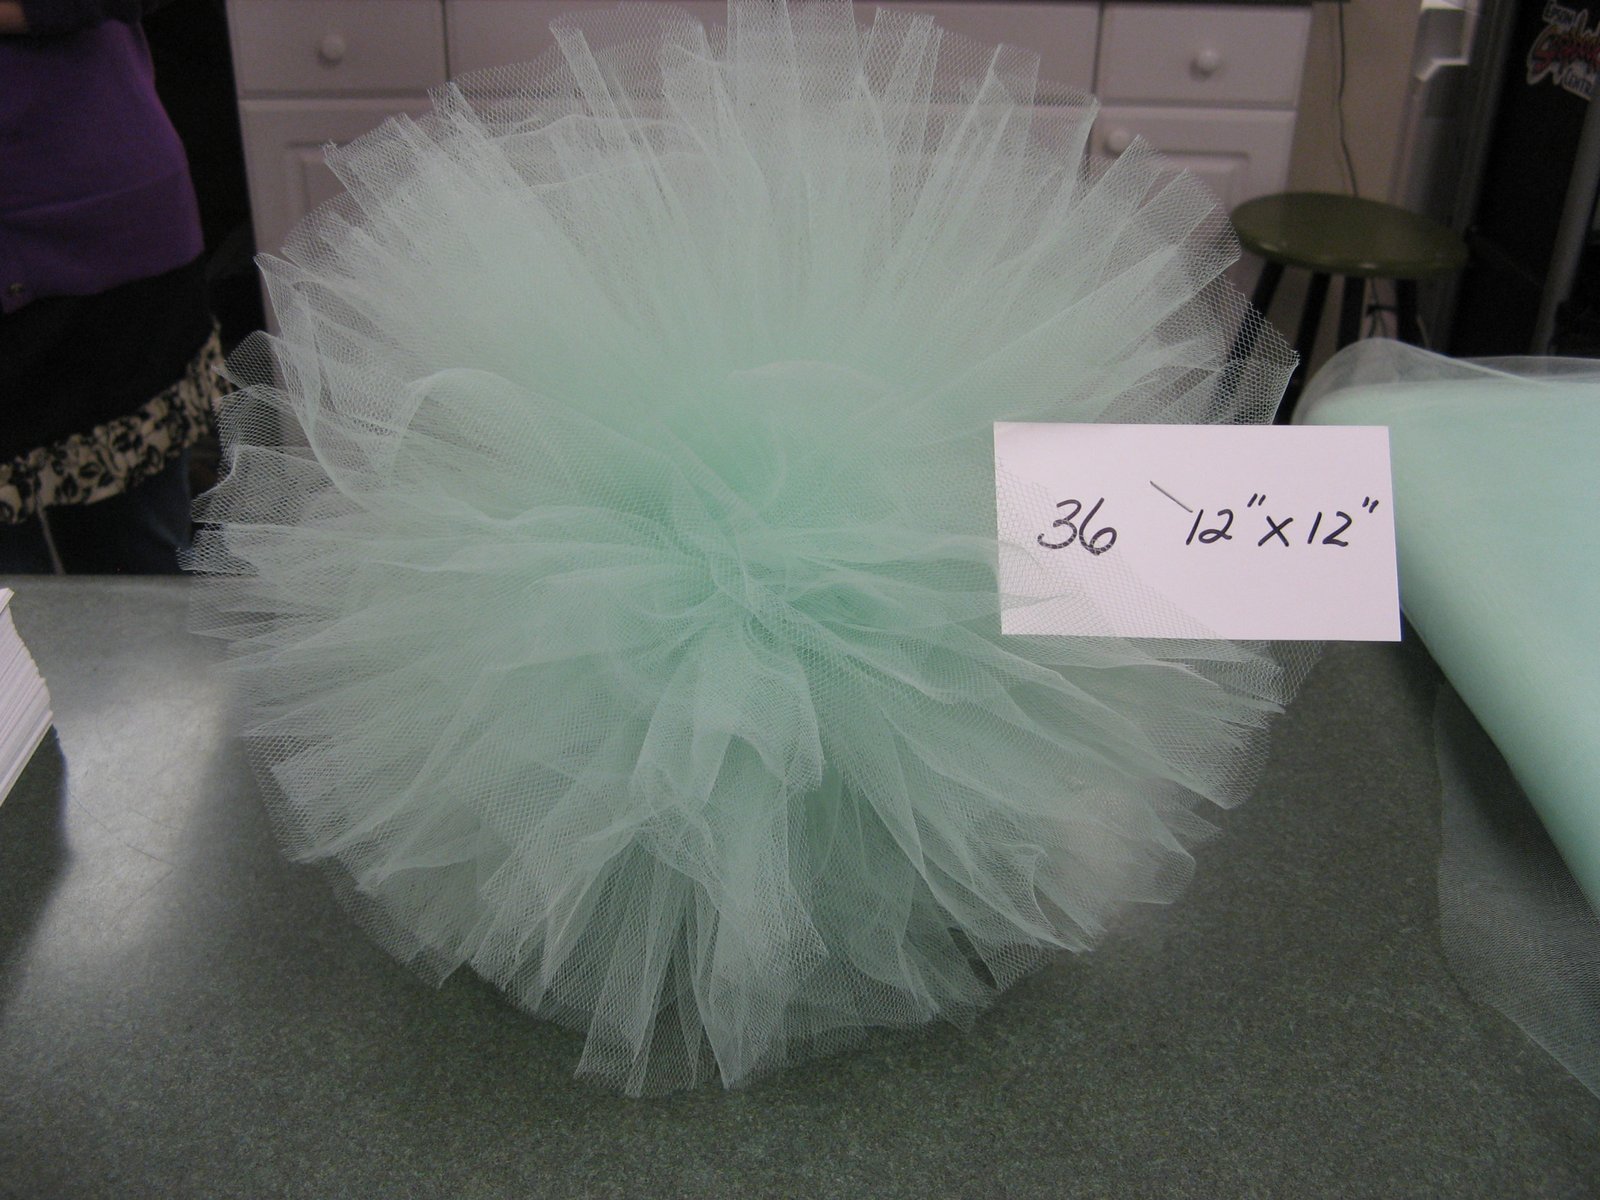
If you're interested in ordering tulle, stop in to discuss available colors and place your order! We'll be happy to show you how to make your own tulle ball decorations.
Thanks, Maggie, for sharing your expertise with us!
Janet
Subscribe to:
Posts (Atom)


