Monday, December 10, 2012
Hello, Memory Bound friends!
I hope your week is off to a great start! It's about to get even better because we have a BIG CARDSTOCK SALE this week! Stop in December 11-13 and buy 20 sheets of cardstock...and we'll give you 10 FREE! That's an awesome deal for all paper crafters!

I've always been a huge cardstock fan. My blog is called Of Cats and Cardstock in honor of two of my favorite things! In fact, if I could only have ONE material to craft with, it would be cardstock...I love it that much! Sure, I love patterned paper, but I tend to use it in small increments. My friends will tell you that I can stretch a sheet of patterned paper for a very long time! But cardstock? I go through it like water, so I buy my most frequently used colors in large quantities.
Here are a few examples of projects I've made almost completely with cardstock! Click on the photos for a closer look.
This is one of the cards I created for our December tool demos. There are only two narrow strips of patterned paper across the bottom of the card. The card base and green piece (made with the Mini-8 Punch) are cardstock. The embossed gray cardstock strip provides textural interest.

Remember this little guy from last Valentine's Day? He was made completely from cardstock.

Katie loves cardstock, too! This is one of the great cards she created for our recent Christmas Card Extravaganza class, and it's almost completely made of cardstock.

Here's a layout created entirely from cardstock! I especially love how neutral cardstock helps the reader focus on the photos. Cardstock always plays a supporting role -- never drawing attention away from the most important things on your page!

This layout is almost completely made from cardstock, except for a few tiny bits of patterned paper.

This page is made entirely from cardstock. I printed the text directly on my background cardstock, then cut 3 blocks of cardstock to match the kids' shirts. If color is an issue, cardstock always comes to the rescue!

There's no patterned paper to be found in this page, either. The photo at left (with the striped comforter) provides a pattern and color scheme, so I chose solid cardstock to support it. Using cardstock for die cutting and punching also allows you to customize your page. In this instance, the title letters were die cut from cardstock, and the punched cardstock dots provide a contrast to the otherwise straight lines found on the page.

Here's another layout made completely from cardstock. When working with distance photos, it can be difficult to find patterned paper that doesn't distract from the small subjects. Again...cardstock to the rescue! In this example, I embossed the small piece of gray cardstock for textural interest.

I could go on and on about the wonders of cardstock! Be sure to stop in December 11-13 and stock up for the New Year of crafting. Unlike Christmas cookies (ahem!)...one can never have too much cardstock!
Happy crafting!
Janet
Saturday, December 8, 2012
Hello, Memory Bound friends!
I hope your weekend is off to a great start! Weekends are the perfect time to do a bit of holiday crafting, and we've got a fun project idea to share with you today. This 12 Days of Christmas project was made with our Doodlebug pre-made envelopes and could not be cuter! This would be a wonderful project to create with kids.

So...when do the 12 Days of Christmas begin, anyway? To be precise, this is the period of time starting with December 25 and continuing to January 5, the Eve of Epiphany. But in popular culture, it sometimes begins on December 14 and continues until Christmas Day, sort of like a mini Advent season.
Our project could be made with any period of time in mind...or instead of numbers, you could place a child's name on each envelope or tuck photos inside. Use any number of envelopes you'd like. Or...make it for Valentine's Day (12 Days of Love!) using a different color scheme. Be creative!
Here's what the envelopes look like.
I hope your weekend is off to a great start! Weekends are the perfect time to do a bit of holiday crafting, and we've got a fun project idea to share with you today. This 12 Days of Christmas project was made with our Doodlebug pre-made envelopes and could not be cuter! This would be a wonderful project to create with kids.

So...when do the 12 Days of Christmas begin, anyway? To be precise, this is the period of time starting with December 25 and continuing to January 5, the Eve of Epiphany. But in popular culture, it sometimes begins on December 14 and continues until Christmas Day, sort of like a mini Advent season.
Our project could be made with any period of time in mind...or instead of numbers, you could place a child's name on each envelope or tuck photos inside. Use any number of envelopes you'd like. Or...make it for Valentine's Day (12 Days of Love!) using a different color scheme. Be creative!

Overlap the envelopes and adhere them together with Scor-Tape or Tacky Tape or, as we've done, break out the sewing machine and run a line of stitching down each side.

The envelopes are solid colors, so you can cover the fronts in coordinating Christmas paper. Add bits of pen stitching with our favorite white Uniball Signo pen.

Add stickers, tags, and labels to each envelope, then attach a ribbon to the top so you can hang it, and you're good to go!

Stop in and purchase your supplies to make this adorable project this weekend!
Happy weekend crafting!
Janet
Happy weekend crafting!
Janet
Thursday, December 6, 2012
Hello, Memory Bound friends!
If you're looking for a fun and easy Christmas garland idea, look no further! Maggie whipped up this festive garland using our Accu-Cut Christmas light die. It would be adorable hanging across a mantel or on a Christmas tree!
If you're looking for a fun and easy Christmas garland idea, look no further! Maggie whipped up this festive garland using our Accu-Cut Christmas light die. It would be adorable hanging across a mantel or on a Christmas tree!

Maggie made the die cut Christmas lights from glitter paper. It's nice and heavy so it will hold up well for many seasons! To make the shiny top portion of the lights, cut the die a second time (just the top part of the shape) using Ranger foil sheets and adhere. Maggie strung her lights on twine -- we have many twine and ribbon options to choose from!
If you have kids in your life, this would be a fun project to do with them this weekend. Stop in and we'll help you pick out materials to get started on making your own garland to match your home decor!

Janet
Tuesday, December 4, 2012
Hello, Memory Bound friends!
We have one more opportunity for you to make a holiday card this season! Jean designed a beautiful Christmas card with a special closure for our next Create-A-Card afternoon. Our Create-A-Card events offer you a fun way to try new techniques and products while creating a card for someone special.
Stop in on Friday, December 7 anytime between 1 and 6pm and make Jean's card for just $1. This elegant and versatile design could be replicated for anyone on your list!


We hope to see you Friday!
Janet
Sunday, December 2, 2012
Hello, Memory Bound friends!
I'm excited to share today's post with you!
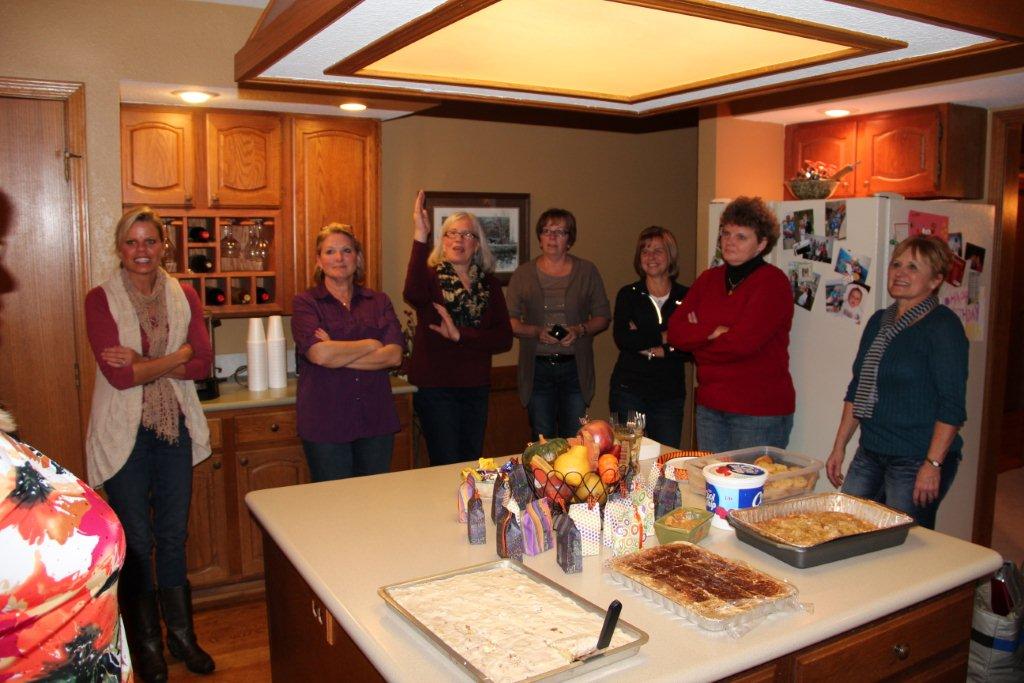
A few weeks ago, the Memory Bound staff toured three of our staff members' crop rooms. Of course, no such tour would be complete without FOOD, so the tour was also a progressive dinner! Pat organized the fun evening and was also the second stop on the tour. The gals touring brought all the food, so the hostesses didn't need to worry about a thing other than having their space available for touring! I hope you enjoy these great photos from the evening, mostly taken by Dawn.
I'm excited to share today's post with you!
A few weeks ago, the Memory Bound staff toured three of our staff members' crop rooms. Of course, no such tour would be complete without FOOD, so the tour was also a progressive dinner! Pat organized the fun evening and was also the second stop on the tour. The gals touring brought all the food, so the hostesses didn't need to worry about a thing other than having their space available for touring! I hope you enjoy these great photos from the evening, mostly taken by Dawn.
* * * * *
My craft room/office was the first stop on the tour. I was completely overwhelmed with the amount of fantastic FOOD everyone brought! We had planned to have appetizers at my house, so I expected they'd show up with a bag of chips and a plate of veggies which would have been great, but I should have known better! They swooped in with all kinds of appetizers, dips, and drinks...Michele even brought cappuccino with tiny cups, complete with whipped cream! I tell you the truth: THESE MB GALS CAN COOK! :) It was more tasty food than has EVER been in my kitchen at one time!
Seriously, they thought of everything! And the amazing thing is that when we were done at my house, they scooped it all up and left NOT A TRACE!
Here are Diane and Tess at the start of this fun evening!

I took a few gals at a time upstairs to visit my craft room/office. I'm MUCH more at home there than the kitchen! My space is in the room above our garage, which was originally intended to be a bedroom but has always functioned as our home office and my crafting space. I've been updating it over the past year or so, finally finishing it this past summer.

I tried to be as economical as possible when working on my space. The cubes (which I use to store a lot of my smaller tools and supplies) came from Target as did the chair, ottoman, table, rug, and tree decal. My daughter sewed the pillows for me. The fabric served as my color inspiration for the room.

Here are Tess, Kellie, Mindy, and Bonnie! It was so much fun to share the space with people who actually GET IT! LOL Although my husband is supportive, he just doesn't seem to get all that excited about ribbon and paper storage. :)


My favorite part of the room is the walk-in closet. Previously it was COMPLETELY FILLED with tubs of old school papers, and when you opened the door, it blocked one half of the closet. I moved all of the tubs to the basement so that I could use the space for my supplies, then I decided to remove the door and hang a curtain so that the closet would function more like a little alcove.

Here are Heidi and Tess clowning around -- aren't they adorable? They are all welcome back any time, with or without food!

Most of my closet containers are labeled, which makes it much more fun to put things away when I'm done working! The drawers at the right house my scraps of patterned paper and cardstock. The dots indicate the color family -- in rainbow order, of course! :)

Since the closet is now open to the room, I got the crazy notion that everything needed to be color coordinated, which meant I had to somehow transform my existing storage pieces. I had stored all of my books and magazines in inexpensive cardboard magazine holders, so I simply covered the front side of them in papers to match my color scheme. My daughter and I even spray painted some of my ugly photo boxes to match.
You can see more photos of my space on my blog here!

Our next stop was Pat's house, where we enjoyed a delicious main course of lasagna and salad! Here are Pat and Tess (notice how Tess is in almost EVERY PHOTO? LOL) getting things ready.


After dinner, we all converged on Pat's room! Her wonderful space previously functioned as a bedroom. She has a great table which provides plenty of space for her projects!

Pat has an eye-catching red/black color scheme in her space. We all loved her black cubes from IKEA, which she has filled with containers in matching colors. The cubes hold an amazing amount of supplies!

In this photo, you can see Pat's closet. It had some built-ins already in place, so Pat added additional stacking drawers on either side to expand her storage space. Closets are wonderful things!


Here are Pat's color-coordinated photo boxes!

Our last stop was Diane's house, where we enjoyed a wonderful array of desserts before checking out her great space.

I couldn't decide which dessert to have, so I had some of each! :)

Here's an "aerial" view of Diane's room from just outside the door. (Dawn must have stood on a chair to get this shot!) Diane's great space also used to be a bedroom.

Her son-in-law made several custom desk pieces for her room, including the large table we all loved in the center of the room (shown below). Diane stands to work at the table, which also includes several storage shelves.

Diane has done a great job creating beautiful wall art for her space, including lots of family photos and vintage pieces.

You can see in the photo below that Diane has also made good use of the closet. She filled it with a cube storage unit and added stacking trays and drawers to maximize her storage. There is even room for her sewing machine in the closet!

As a side note, I'll be teaching our Get Organized Challenge class again in January (watch for the date on our next calendar, due out in mid-December). Getting organized is one of my favorite topics, and I hope you'll join me to discuss LOTS of ideas for transforming your space! We have many storage pieces at Memory Bound for you to get started organizing your stash!
I hope you've enjoyed this little tour of our crafting spaces! It was so much fun that we hope to do another tour in the spring and visit some other staff crop rooms!
Happy crafting AND organizing!
Janet

Pat has an eye-catching red/black color scheme in her space. We all loved her black cubes from IKEA, which she has filled with containers in matching colors. The cubes hold an amazing amount of supplies!

In this photo, you can see Pat's closet. It had some built-ins already in place, so Pat added additional stacking drawers on either side to expand her storage space. Closets are wonderful things!


Here are Pat's color-coordinated photo boxes!

Our last stop was Diane's house, where we enjoyed a wonderful array of desserts before checking out her great space.

I couldn't decide which dessert to have, so I had some of each! :)
Here's an "aerial" view of Diane's room from just outside the door. (Dawn must have stood on a chair to get this shot!) Diane's great space also used to be a bedroom.

Her son-in-law made several custom desk pieces for her room, including the large table we all loved in the center of the room (shown below). Diane stands to work at the table, which also includes several storage shelves.

Diane has done a great job creating beautiful wall art for her space, including lots of family photos and vintage pieces.

You can see in the photo below that Diane has also made good use of the closet. She filled it with a cube storage unit and added stacking trays and drawers to maximize her storage. There is even room for her sewing machine in the closet!

As a side note, I'll be teaching our Get Organized Challenge class again in January (watch for the date on our next calendar, due out in mid-December). Getting organized is one of my favorite topics, and I hope you'll join me to discuss LOTS of ideas for transforming your space! We have many storage pieces at Memory Bound for you to get started organizing your stash!
* * * * *
We all got so many great ideas by touring these spaces! Although everyone's approach to organizing is different, I think
we'd all agree that whatever kind of space you have -- whether it's a corner, a spare bedroom, a basement nook, or a closet -- it's worth the time
and effort to make sure it's organized for how you work and think. It's also very important to make your space inspirational! You'll be far more productive if you feel good working in the space you have. I hope you've enjoyed this little tour of our crafting spaces! It was so much fun that we hope to do another tour in the spring and visit some other staff crop rooms!
Happy crafting AND organizing!
Janet
Friday, November 30, 2012

Hello, Memory Bound friends!
Although it's a nice day here in central Iowa, I've got SNOW on my mind! I'm the first to admit that I LOVE a good snowstorm...as long as I don't have to drive in it! I love the feeling of being comfy-cozy in my house with a cup of something warm, watching the snow falling outside the window.
Of course, in the morning, it could look like THIS:

Or this:


The album has several pull-out tabs and pockets with ample room for your favorite snow photos and stories. And everyone will receive a mini-set of snowflake stamps which you'll be able to use for all kinds of projects!


I hope you'll join me in class! You'll find details below. Give us a call at (515) 965-1102 to register!
Janet
Although it's a nice day here in central Iowa, I've got SNOW on my mind! I'm the first to admit that I LOVE a good snowstorm...as long as I don't have to drive in it! I love the feeling of being comfy-cozy in my house with a cup of something warm, watching the snow falling outside the window.
Of course, in the morning, it could look like THIS:

Or this:

You just can't match the the peacefulness of the landscape on the morning after a big snow.

And when the sun comes out, it's spectacular!


Because I love snow, I was immediately drawn to the latest line by We R Memory Keepers: Winter Frost. It's such a pretty collection and will be perfect for all of your snowy day pictures!
I had a lot of fun creating the project for my upcoming Winter Frost Mini-Album class. This class will be offered on Saturday, December 15 and again in January (watch for the date on our next calendar, due out in mid-December). Here are a few pictures of the mini-album we'll be making in class:

The album has several pull-out tabs and pockets with ample room for your favorite snow photos and stories. And everyone will receive a mini-set of snowflake stamps which you'll be able to use for all kinds of projects!


Janet

Winter Frost Mini-Album
Sat,
Dec 15, 9:30am-12pm – Fee: $24
Instructor: Janet Petersma
Skill Level: Any
Bring Basic Class Kit, Crop-A-Dile, Tacky Tape, Liquid Pearls (silver),
Distress Stickles (Rock Candy), medium acrylic block, clear embossing ink pad,
pop dots, glue dots, and corner rounder.
Join Janet to make a beautiful winter
mini-album using the lovely new Winter Frost line. It will be the perfect place
for your favorite snowy day photos and memories. We’ll stamp some sparkly
snowflakes to include in our album, and the snowflake stamps are yours to keep!
Subscribe to:
Posts (Atom)


